How to Change Chrome's Default Zoom Settings?
Changing Chrome's zoom setting is simple, letting you easily adjust how much a website is zoomed in or out. This feature helps you customise your browsing experience to match your needs.
Steps to set a standard zoom size for all websites in google chrome
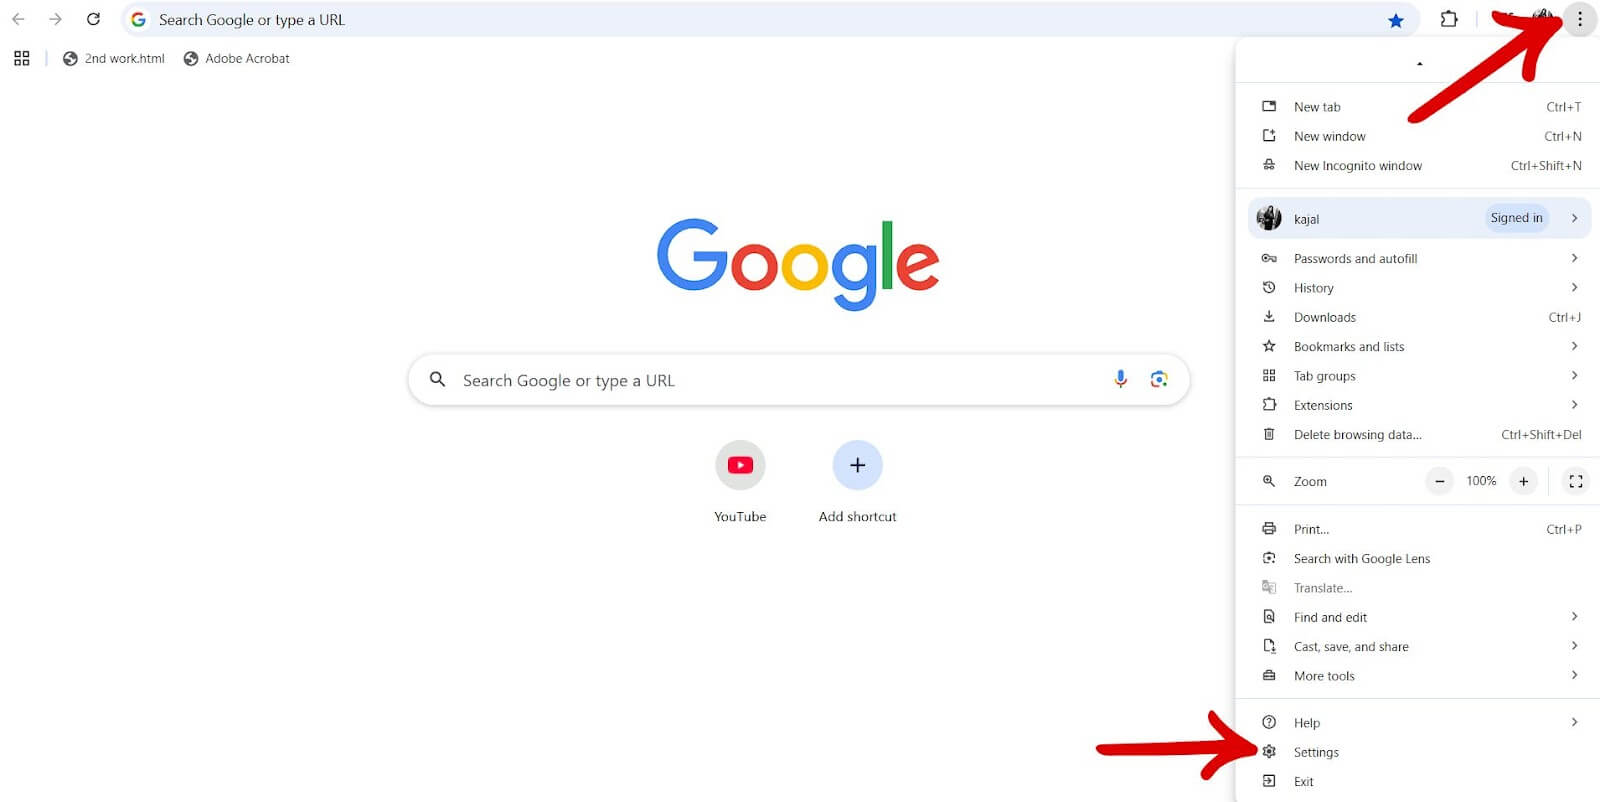
Step 1: Open Chrome, then click the three vertical dots in the top-right corner of the browser. Click Settings from the dropdown menu.
Step 2: Scroll down and find the Appearance section on the left side.
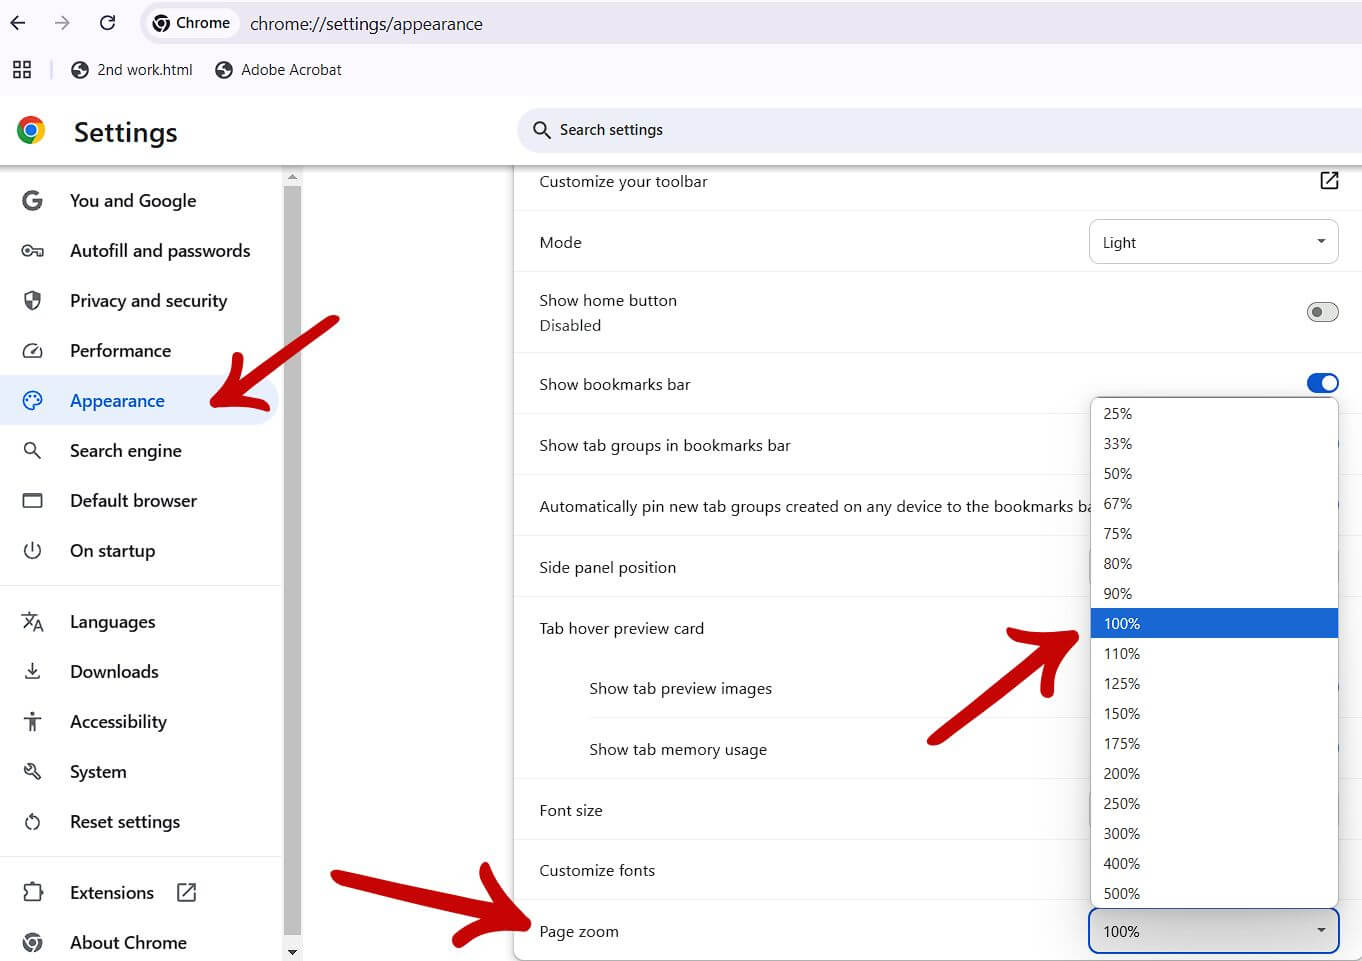
Step 3: Open the "Page Zoom" drop-down menu and select the best zoom setting for you.
Your changes are automatically saved. You can now close the Settings tab. This will apply to every website you visit in Chrome unless you've previously set a different zoom level for a specific site.
Steps to set a custom zoom level for a specific website in chrome
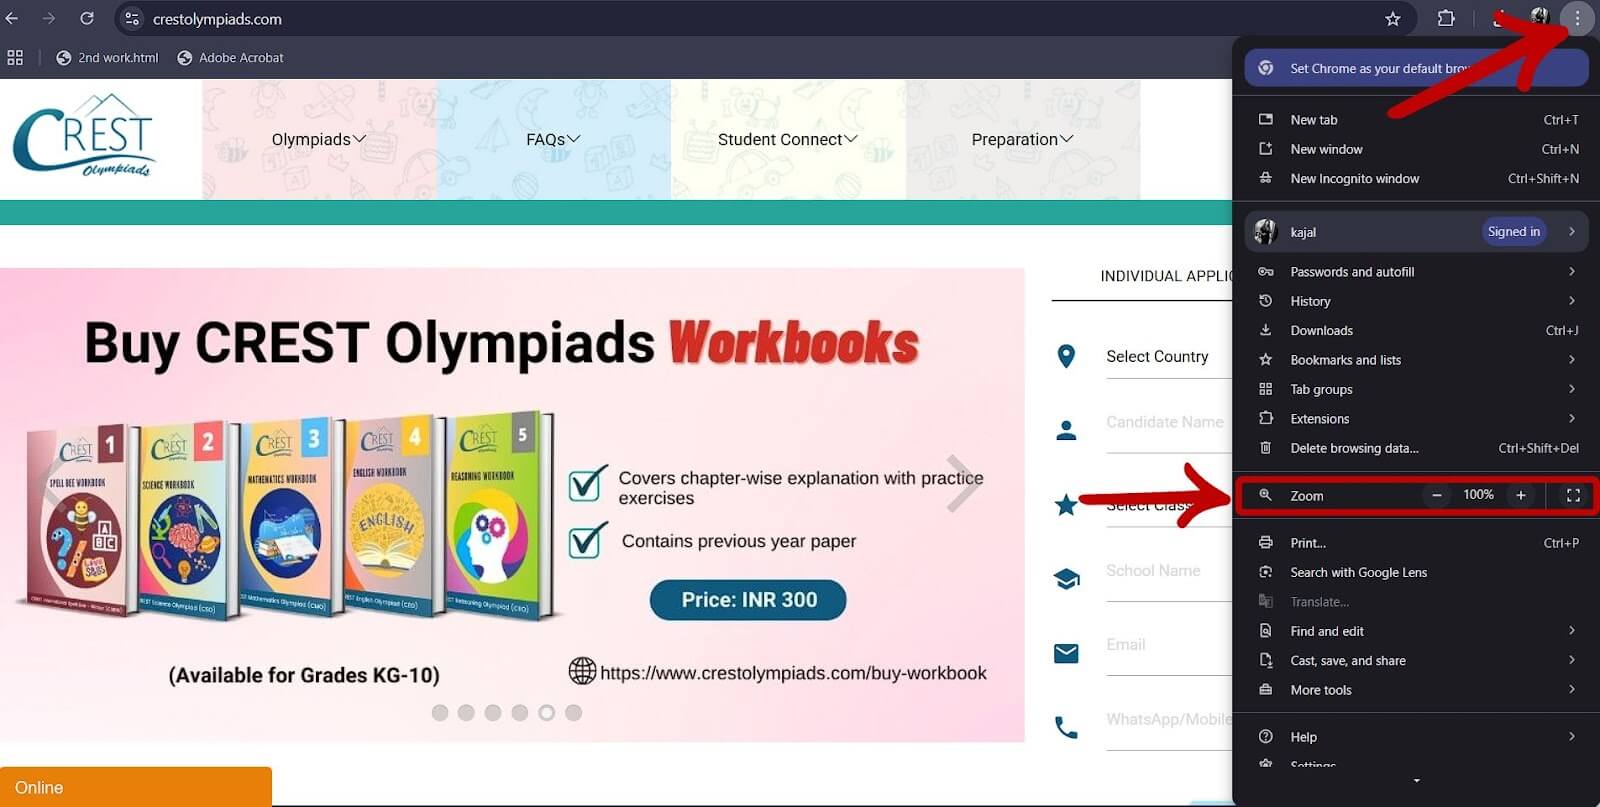
Step 1: Visit and open the website you want to adjust the zoom for; click the three vertical dots in the top-right corner of Chrome.
Step 2: In the menu that appears, click the Minus (-) or Plus (+) icons to zoom out or in, respectively. Chrome will automatically remember the zoom level you set for that specific site.
Control Using Keyboard: You can also use these handy keyboard shortcuts to set a default zoom for a website quickly.
- Press Ctrl and + to zoom in, or Ctrl and - to zoom out.
- Press Ctrl and scroll in or out with your mouse.
- Press Ctrl and press zero to reset the zoom level to 100 per cent.
How to Change Default Zoom Settings in Microsoft Edge?
The newest version of Microsoft Edge is based on Chromium, which means it shares many of the same features as Google Chrome, including the ability to set default zoom levels for every site or just one. Here's how to do it.
Steps to set a standard zoom size for all websites in microsoft edge
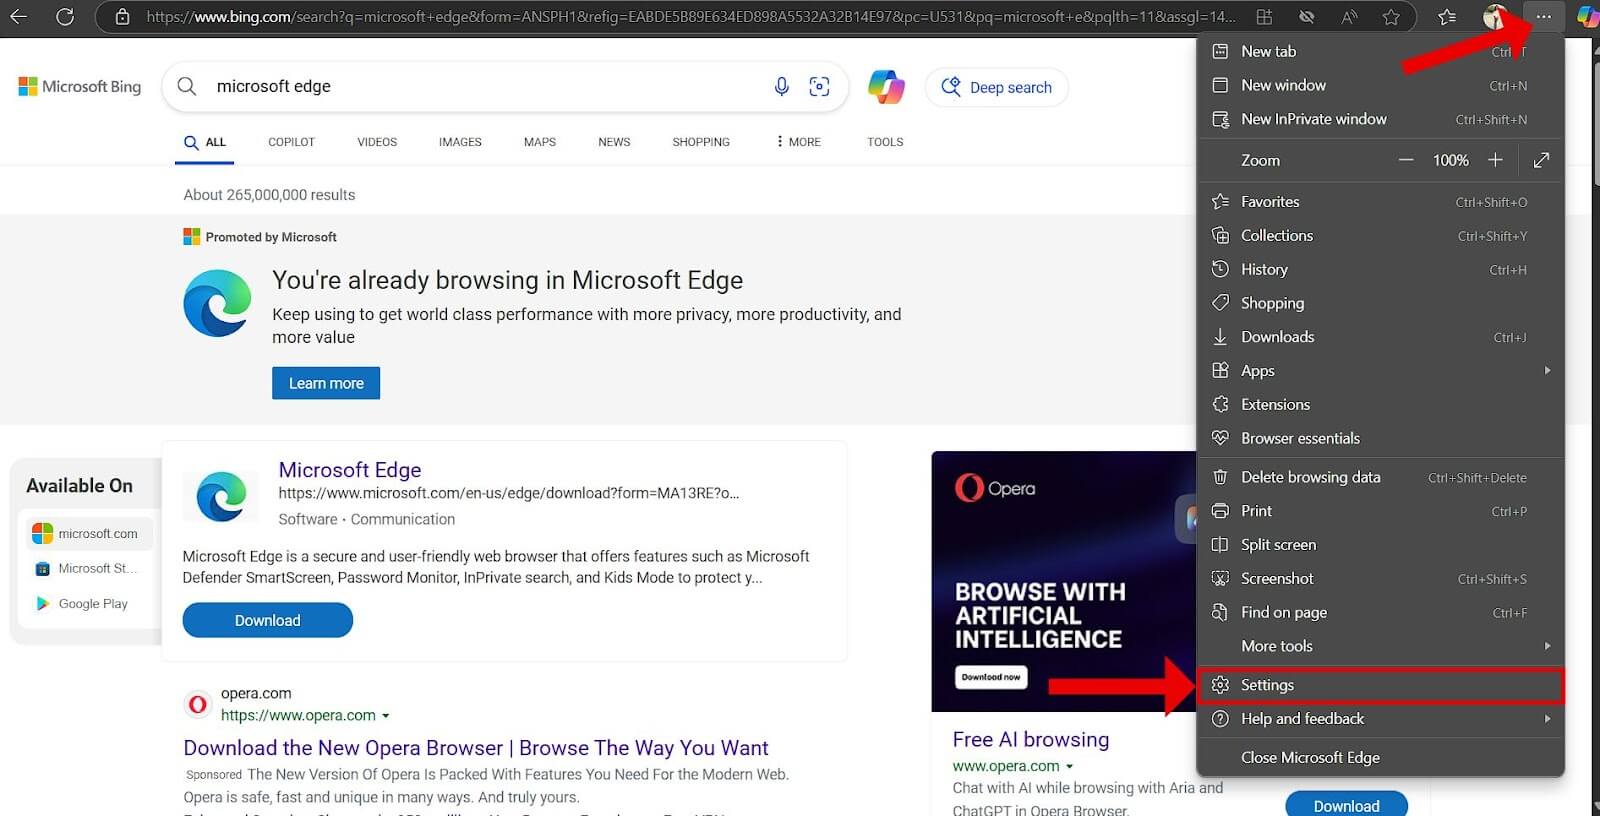
Step 1: Launch the Microsoft Edge browser. Click on the three horizontal dots (menu icon) in the top-right corner. From there, select the Settings button.
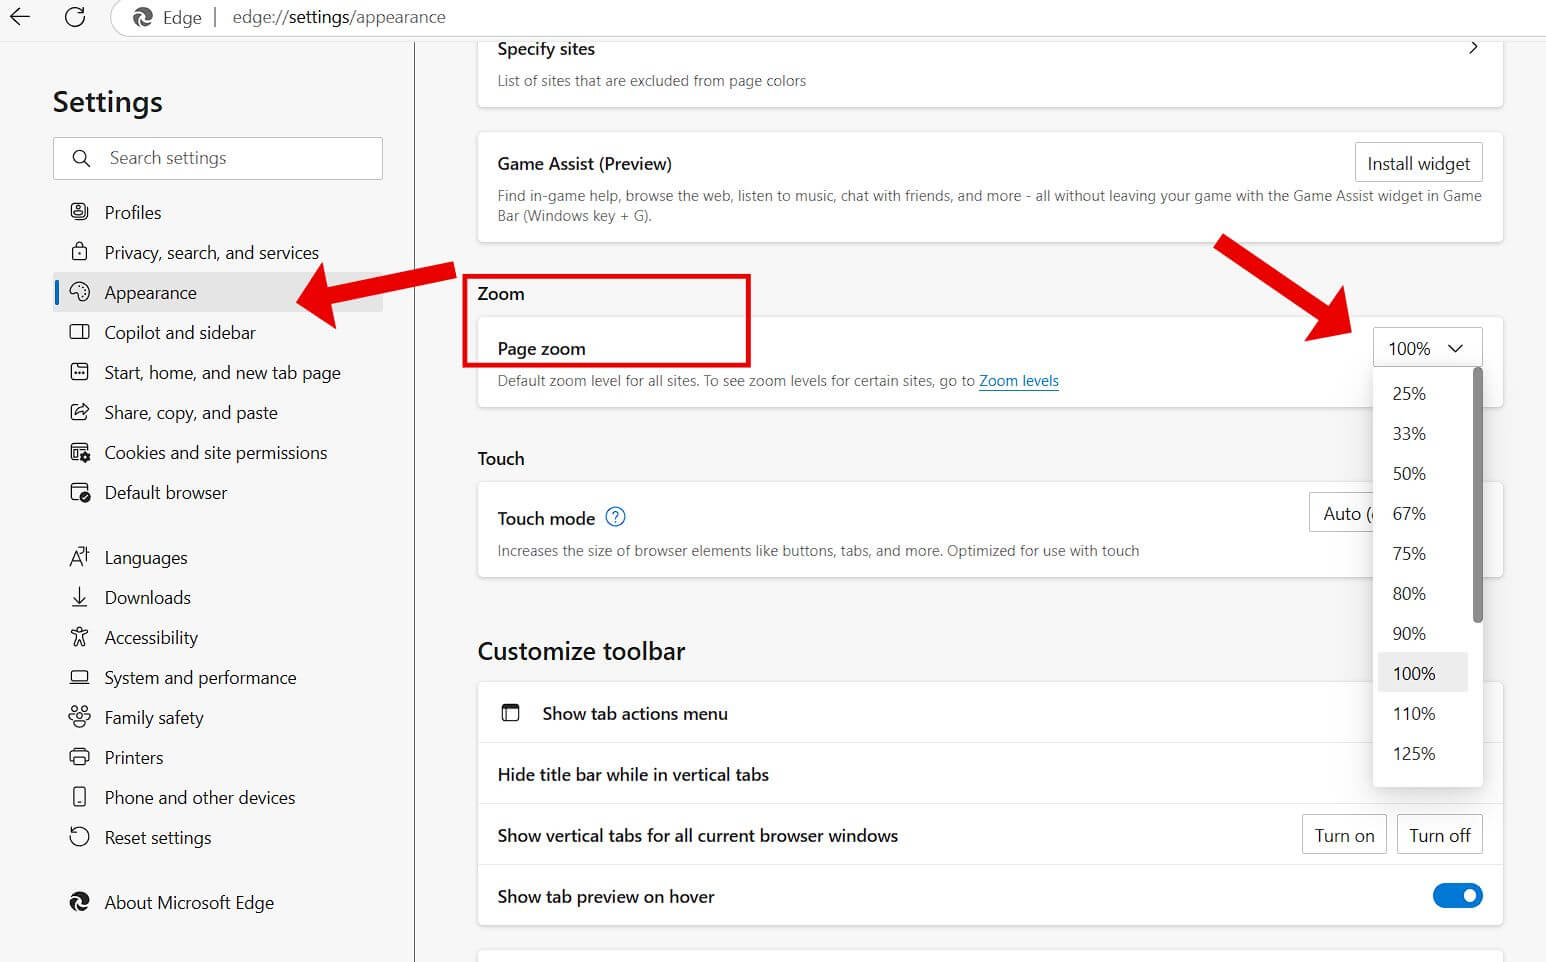
Step 2: Scroll down and find the Appearance section on the left side. You can also type "Zoom" in the "Search Settings" box. Choose your preferred zoom level from the "Zoom" dropdown, click on page zoom. This setting will affect all websites, except those where a custom zoom has been set. Your changes are automatically saved. You can now close the Settings tab.
Steps to set a custom zoom level for a specific website in microsoft edge
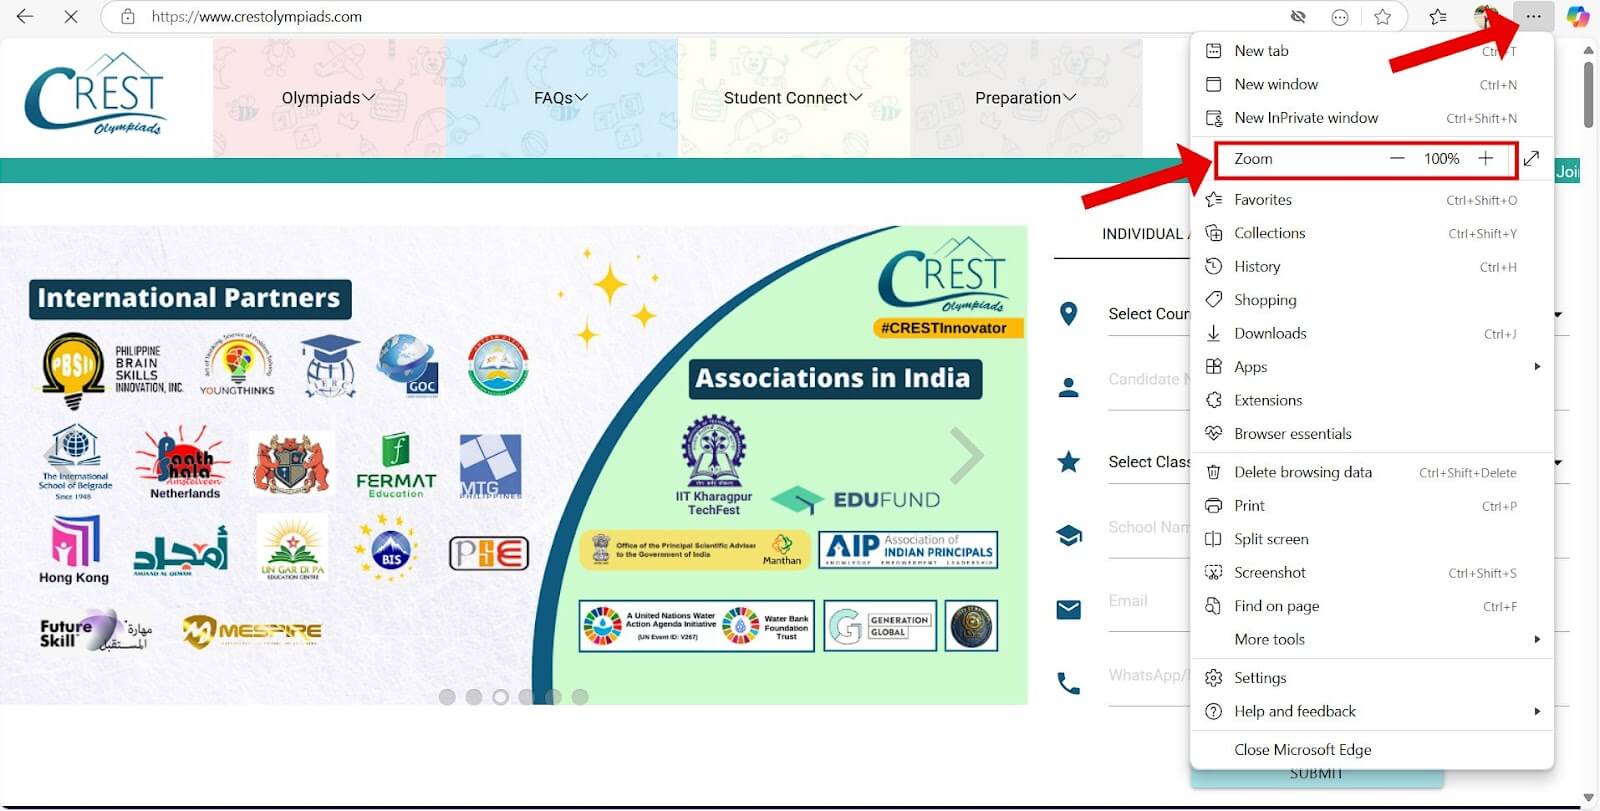
You can easily change the zoom for a specific website in Microsoft Edge with two clicks. Just click the three dots in the top-right corner, then use the Minus (-) or Plus (+) icons to zoom out or in.
How to Change Default Zoom Settings in Safari for Mac?
Safari, the default web browser on Mac, allows you to adjust the zoom level for both text and content on all websites or individual ones. This feature helps reduce eye strain and enhances your browsing experience by letting you set a preferred default zoom level.
Steps to set a standard zoom size for all websites in safari on mac
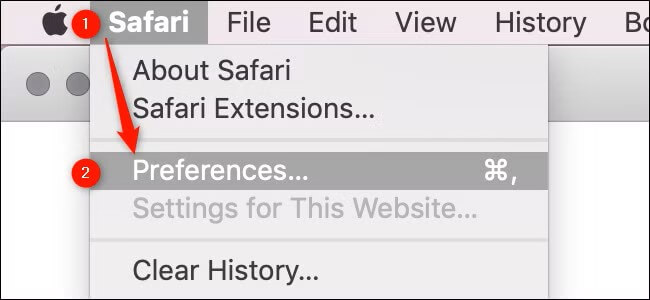
Open the Safari browser on your Mac. Click on "Safari" in the menu bar at the top of the screen, then select "Preferences" from the drop-down menu.
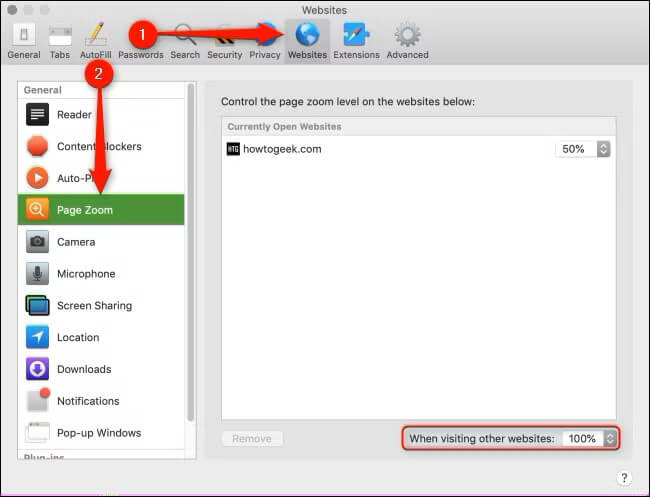
In the Preferences window, click on the "Websites" tab. Select Page Zoom: On the left-hand side, find and select "Page Zoom." select your desired zoom level for all websites.
Steps to set a custom zoom level for a specific website in safari for mac
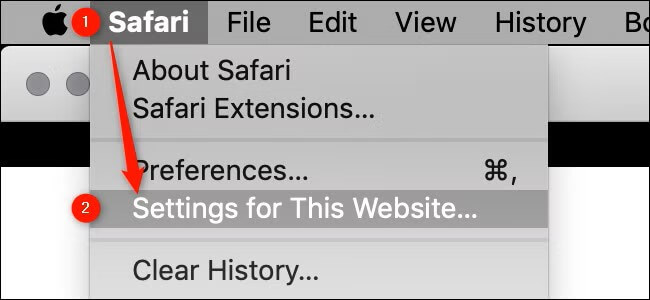
Open the Safari browser on your Mac. Visit the website for which you want to set a custom zoom level. In the top menu bar, Click Safari > Settings for This Website.
Select the current zoom setting next to "Page Zoom" and click your desired setting.
How to Change Firefox's Default Zoom Settings?
If you use Mozilla Firefox, you can set a default zoom level for all websites and customize it for individual sites.
Steps to set a standard zoom size for all websites in firefox
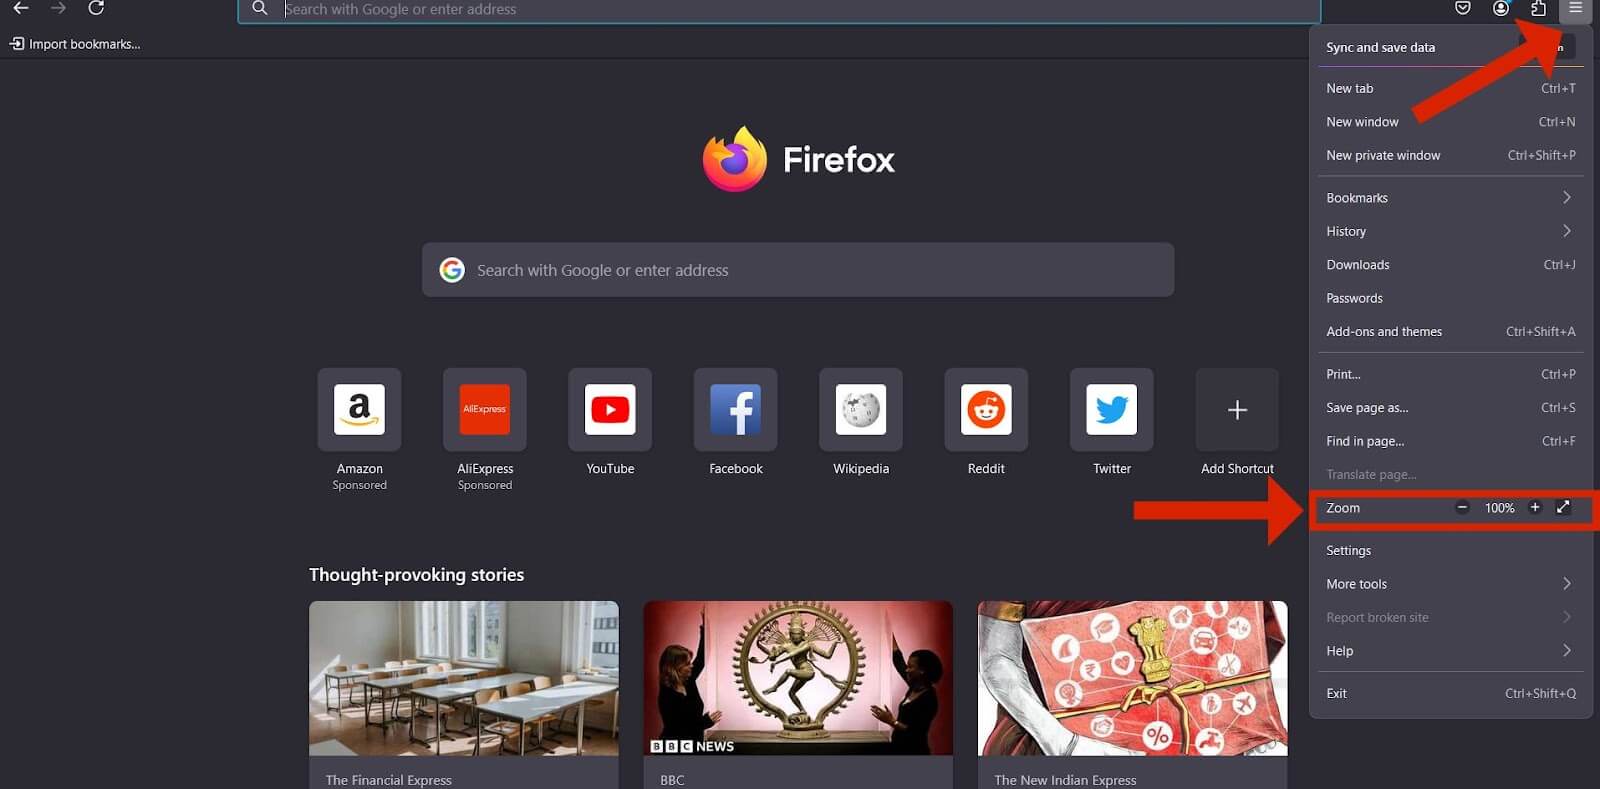
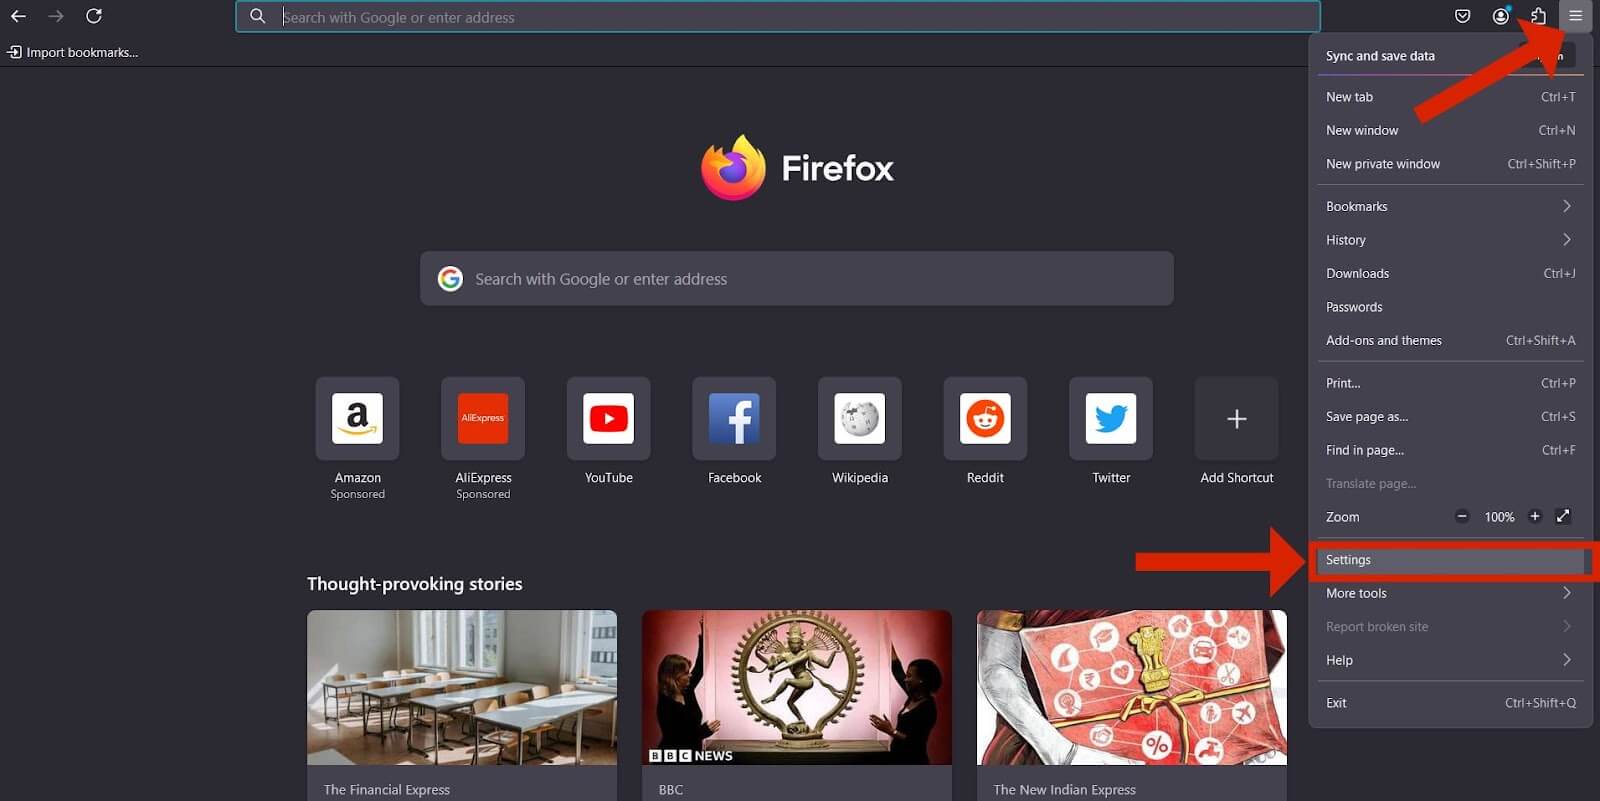
Step 1: Open the Firefox browser on your computer. Click the menu button (three horizontal lines) in the top-right corner and select "Settings".
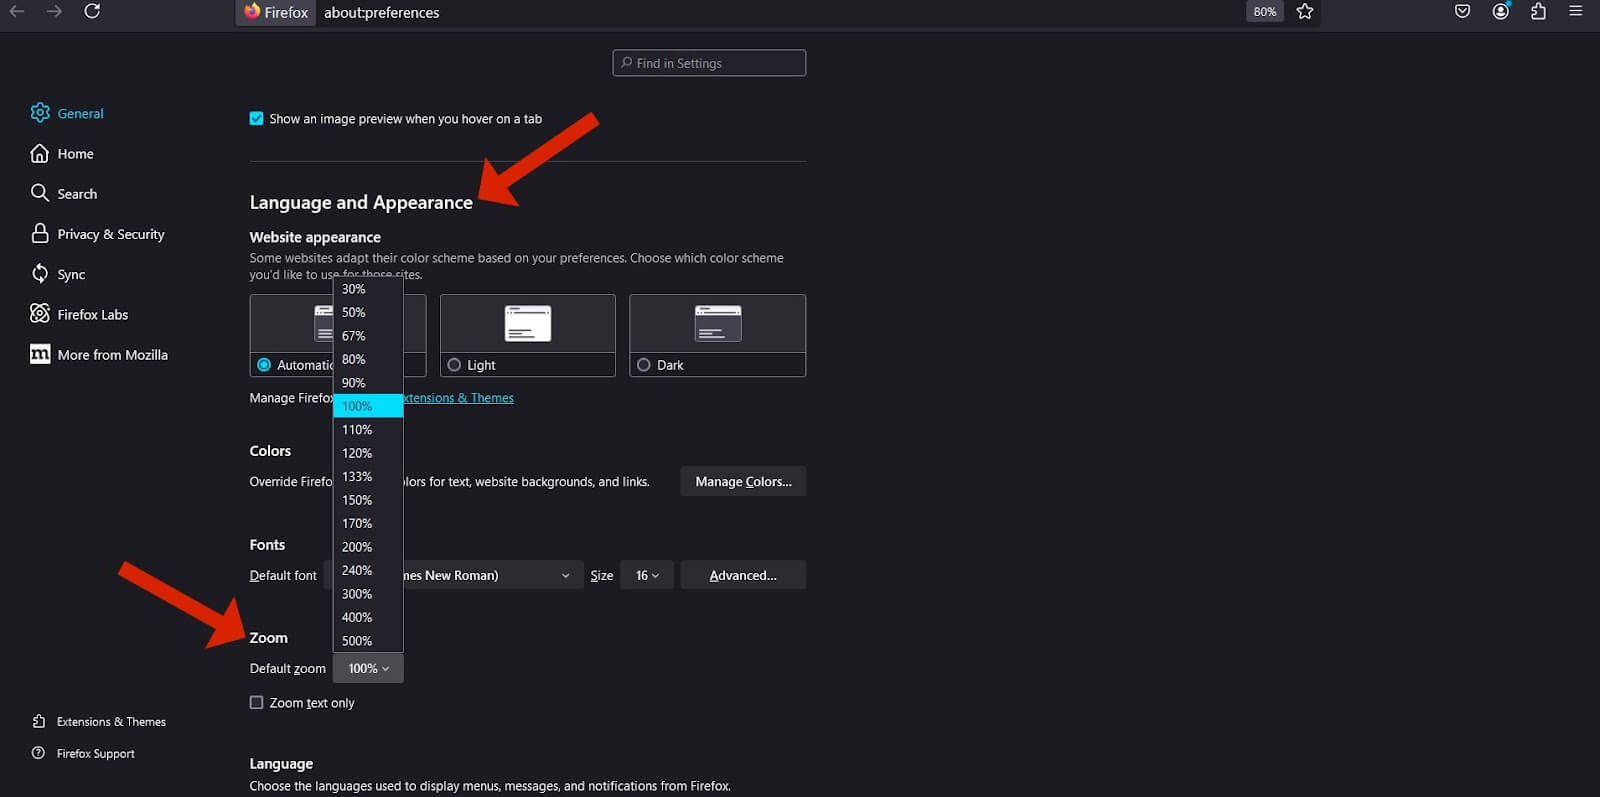
Step 2: Then click on General. In the left-hand menu. Scroll down to the Language and Appearance section.
Step 3: Under the "Zoom" section, you'll find an option to adjust the default zoom level for websites. Use the drop-down menu to set your preferred zoom level. Your changes will be saved automatically.
Steps to set a custom zoom level for a specific website in firefox
Open the Firefox browser on your computer. Go to the website where you want to set the custom zoom level. You can adjust the zoom by pressing Ctrl + to zoom in, and Ctrl - to zoom out.
Alternatively, you can hold Ctrl and use the mouse scroll wheel. Once you’ve adjusted the zoom to your liking, Firefox will remember this setting for that specific website. Every time you visit that website, it will load with the same custom zoom level. Press zero to restore the zoom level to 100 percent.